Agronomy •  4/20/2021

10 Tips for Making the Switch to Strip-Till Farming

Something went wrong. Please try again later...

Written by Matt Essick
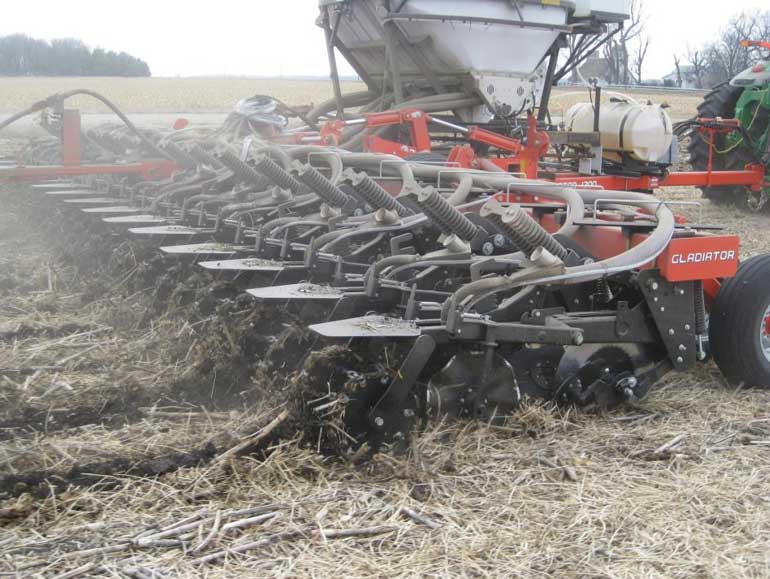
  • Advances in technology and increased interest in nutrient and conservation management have led to higher interest in strip-till. 
  • Strip-till disturbs less soil than traditional tillage and allows you to place fertilizer in a band for crop use.
  • This article addresses some key considerations to keep in mind if you are thinking of switching to strip-till.

1. Select the Right Strip-Tilling Tool

  • Will you be strip-tilling in the fall or spring?  Will you be applying fertilizer with your strips? Do you want to apply anhydrous ammonia in your strips? The best strip-till unit for your farm will depend on your field conditions and goals.
  • If you are planning to strip-till in the spring, consider using a coulter type system versus a shank.
  • If you want to put on anhydrous ammonia, use a shank type of row unit.  A shank row unit may also help break up compaction versus a coulter type of unit.
  • Some tool bars allow you to change out the row unit to have the flexibility to run either coulters or shanks.

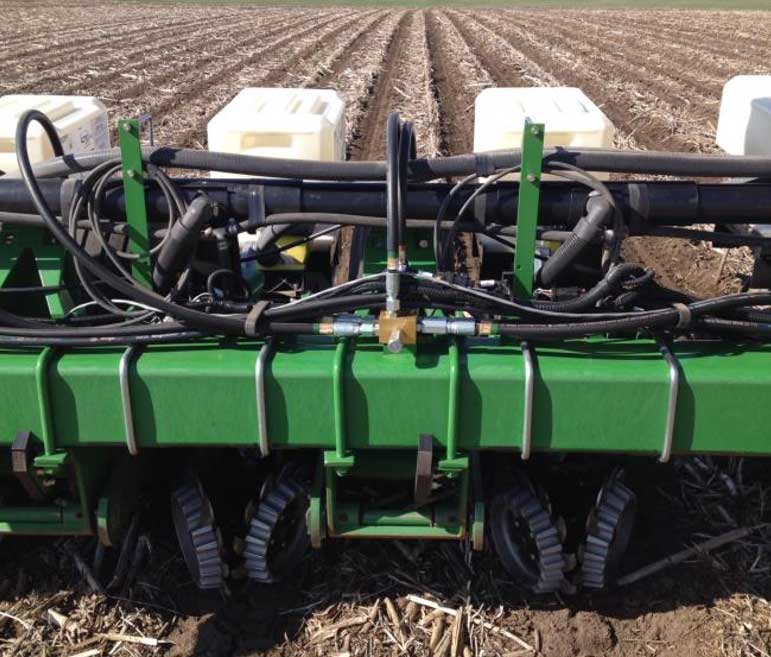
Photo - Tillage bar operating in field

2. Take Representative Soil Samples

  • If you are banding fertilizer with your strip-till pass, make sure you are soil sampling with some cores pulled from the band and some not pulled from the fertilizer band to avoid skewing results.

3. Make Sure You Have Enough Horsepower

  • Make sure you have a tractor with adequate horsepower to pull the strip-till bar through the field.
  • Power requirements vary widely based on equipment configuration and soil conditions, but can be as much as 30 hp per row for a shank type unit in finer textured soils.
  • Running a strip-till bar with an underpowered tractor can lead to excessive wheel slip and fuel consumption, poor quality strips, and damage to the tractor.

Photo - Tillage field operation - green equipment

4. Use RTK GPS to Stay on Track

  • RTK allows you to save your guidance lines from year to year so you can reliably plant right over the strips that you create.
  • If you get off the strip, you will essentially be no-tilling, which can reduce early season stand establishment and yield if your planter is not able to handle the higher amount of residue.

5. Make Sure You Have A Skilled Operator

  • Strip-tilling requires more attention to detail than conventional tilling, so the operator needs to be up to the task.
  • The layout of the strip-till operation sets how the field must be planted, and the quality of the strips is critical for optimizing seed placement, germination, and emergence.
  • Ideally, the operator who does the strip-till operation will be the same operator who plants the field.

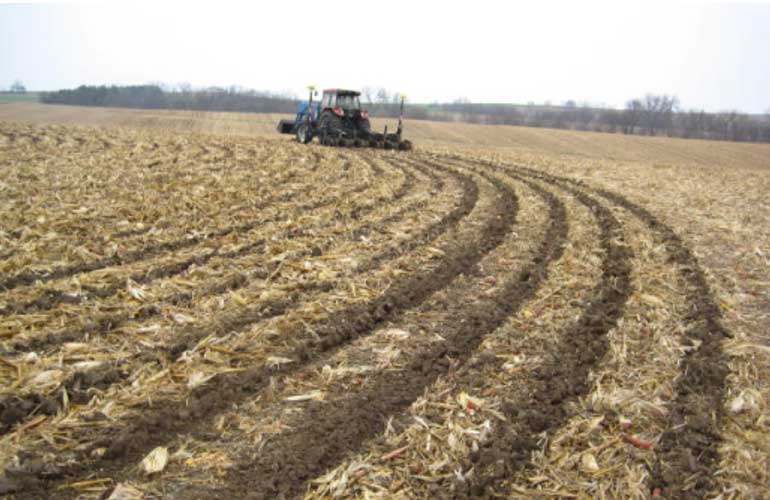
Photo - contour strip tilling in field

6. Be Careful on Contours and Hills

  • It can be challenging to keep the planter on strips when running on the contour on rolling ground, even when using RTK.
  • Fields with hills may be subject to erosion if the strips run down hill, particularly when strip-tilled in the fall.

7. Check the Quality of the Strip-Till Pass

  • Just like with planting, it is important to check the quality of the strip-till pass.
  • The strip should be slightly higher in elevation than the soil around it. If the strip is lower than the soil around it, that can create issues with getting the correct planting depth.
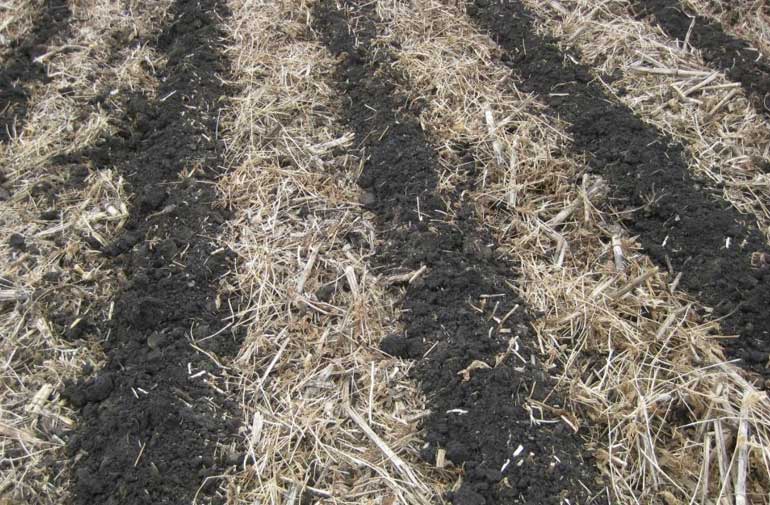
  • An ideal strip-till pass will remove residue from the strips and not mix it into the seed zone.
  • Fertilizer applied using the strip-till unit should be placed at an adequate depth to avoid crop injury.

Photo - crop residue pattern from strip tillage

8. If the Soil is Wet, Wait

  • As with any other type of tillage, running a strip-till bar in wet soil can cause compaction.
  • Coulters units have the potential to create a compacted layer, while shanks can cause smearing in the soil.

9. Choose Hybrids That Have Strong Stress Emergence and Disease Tolerance

  • Pioneer® brand corn products with higher stress emergence scores establish more consistent, uniform stands, on average, than ones with lower scores. Pioneer brand corn products with highly suitable (HS) and suitable (S) high-residue suitability ratings produced higher and more uniform stands in high-residue locations than hybrids with a poorly suited (X) rating.
  • Strong stress emergence can be important in scenarios where it is challenging to stay on the strips when planting.
  • Select for adequate levels of disease tolerance since previous crop residue can harbor inoculum of diseases such as gray leaf spot, northern corn leaf blight, Goss’s wilt, tar spot, etc.

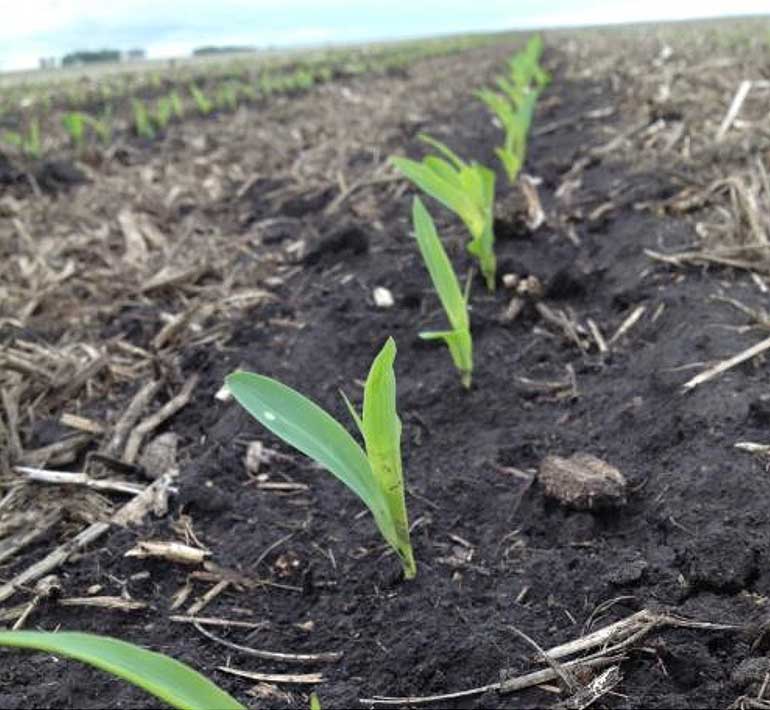
Photo - Young corn growing in field with crop residue

10. Watch Out for Weed Species Shifts

  • Reduced tillage can lead to more winter annual and perennial weed species than you are used to. 
  • Winter annuals include sherpherdspurse, field pennycress and marestail.

References

Photo - closeup - hand holding soybean plant

Earn on Your Acres When You Reduce Tillage

Sell carbon credits on your terms, simply and for a fair price, with help from your trusted Corteva Agriscience or Pioneer advisor.

Get Started

Considering No-Till Farming?

We’ve got 10 tips for adopting a successful no-till cropping system.

See tips


The foregoing is provided for informational use only. Please contact your Pioneer sales professional for information and suggestions specific to your operation. Product performance is variable and depends on many factors such as moisture and heat stress, soil type, management practices and environmental stress as well as disease and pest pressures. Individual results may vary. Pioneer® brand products are provided subject to the terms and conditions of purchase which are part of the labeling and purchase documents.